In this video, we walk you through the practical steps of replacing an I-Line circuit breaker—start to finish. Whether you’re new to I-Line systems or you’ve done a few installations before, this guide reinforces the key procedures and best practices to make sure you’re doing the job right, safely, and efficiently.
This article expands on the video content, breaking down each step in detail to help you follow along with confidence. It’s tailored for professionals like Contractor Carl and Industrial Ingrid, who value clarity, reliability, and performance on the job. And as always, we’ve written it in the tone you expect from Electrical Power and Control—approachable, dependable, and deeply knowledgeable.
What Is an I-Line Circuit Breaker?
An I-Line breaker is a uniquely designed circuit protection device manufactured by Schneider Electric. These breakers are engineered specifically for use in I-Line panelboards, which utilize a secure “hook-and-jaw” connection system to simplify installation and improve conductivity.
Why It Matters
Unlike generic breakers, I-Line models are precision-matched to their panelboards. Their compatibility ensures that:
- Electrical connections are stable
- Safety clearances are maintained
- Performance and code compliance are upheld
These breakers are commonly found in:
- Commercial and industrial facilities
- Manufacturing plants
- Healthcare centers and data hubs
When Should You Replace an I-Line Breaker?
Electrical systems don’t give up without warning. If you know what signs to watch for, you can avoid emergencies and keep operations running without interruption. Here’s when it’s time to consider a breaker replacement:
1. Frequent Tripping
When a breaker trips repeatedly without a clear load issue, it may be failing internally. Ignoring this can lead to operational disruptions and equipment damage.
2. Visible Damage
Burn marks, rust, brittle plastic, or melted parts are visual cues that the breaker is compromised and potentially hazardous.
3. Old Equipment
If your panel has been in place for 10+ years without any breaker updates, it may be time to modernize before problems arise.
4. Manufacturer Recommendations
Follow Schneider Electric’s guidance on service intervals and replacement timelines. Using the wrong replacement model or skipping inspections can create serious electrical risks.
By replacing a faulty breaker promptly, you minimize downtime, protect your team, and maintain the integrity of your entire electrical system.
Safety First: Don’t Skip This Section
If there’s one takeaway from this guide, it’s this: Never work on an energized panel.
Electricity doesn’t forgive mistakes. That’s why we emphasize the importance of full panel de-energization and strict lockout/tagout (LOTO) procedures before you even remove a single screw.
Safety Checklist:
- ✅ Shut off the main power feeding the panel
- ✅ Use lockout/tagout to secure and label the system
- ✅ Confirm de-energization using a voltage tester
- ✅ Wear PPE: insulated gloves, safety glasses, flame-resistant gear
- ✅ Never rush or take shortcuts—double-check every step
When in doubt, call a licensed electrician. There’s no shame in choosing safety over speed.
Tools & Materials Checklist
To ensure a smooth replacement, gather the following before you begin:
- ✅ New I-Line breaker (same model or Schneider-approved substitute)
- ✅ Screwdriver (flathead or Phillips, depending on model)
- ✅ Lockout/tagout kit
- ✅ PPE (gloves, glasses, flame-retardant clothing)
- ✅ Flashlight or headlamp
- ✅ Voltage tester or multimeter
Pro Tip: Always verify the amp rating, voltage, and breaker model before purchase. This info is usually printed on the breaker’s label or listed inside the panel door.
Understanding How It All Fits Together
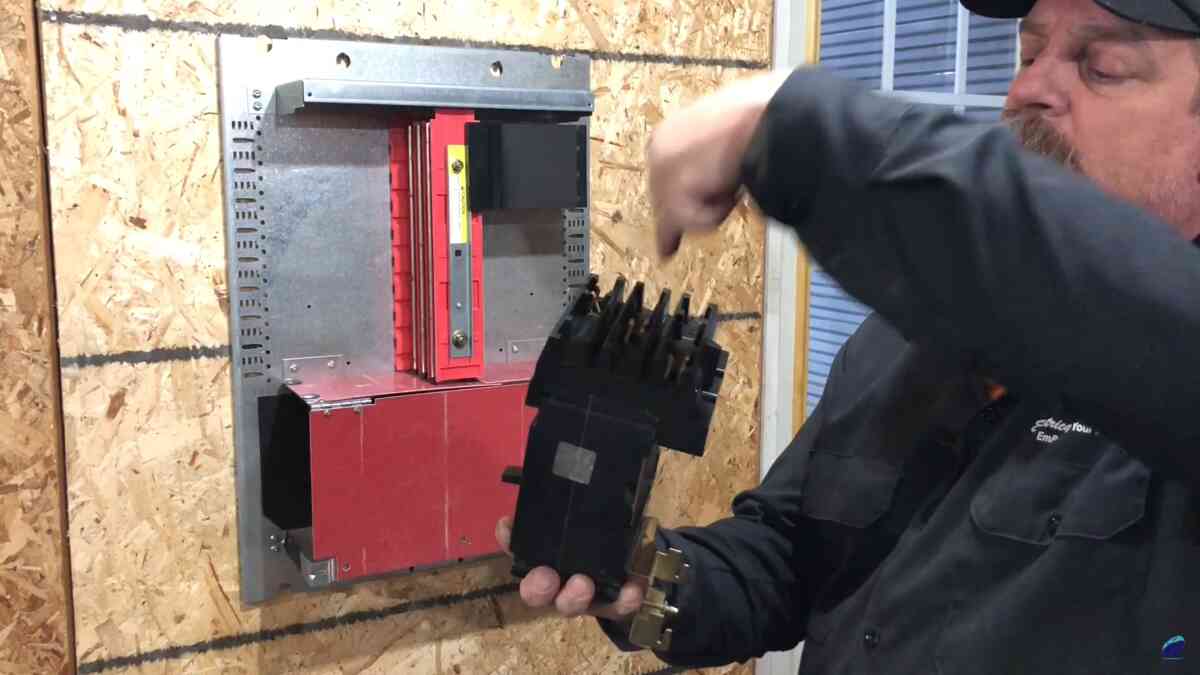
Before you get hands-on, it’s worth reviewing the anatomy of an I-Line breaker and panel:
- Foot with Hooks – Slides into the panel’s teardrop-shaped mounting slots.
- Copper Jaws – Clamp onto the bus bar to carry current.
- Retainer Screw – Secures the breaker in position.
- Insulators – Separate each phase (A, B, C) to prevent shorts.
The panel itself will include:
- Laminated bus bars for each phase
- Red insulator boards between bus layers
- Teardrop slots for breaker mounting
- A hole for the retainer screw
This modular design ensures safety and quick swaps, but only when installed correctly.
Step-by-Step: How to Replace an I-Line Breaker
Let’s walk through the full process from shutdown to startup.
Step 1: Turn Off and De-Energize
- Switch the main panel power OFF.
- Apply lockout/tagout devices and warning tags.
- Verify that all circuits are de-energized before continuing.
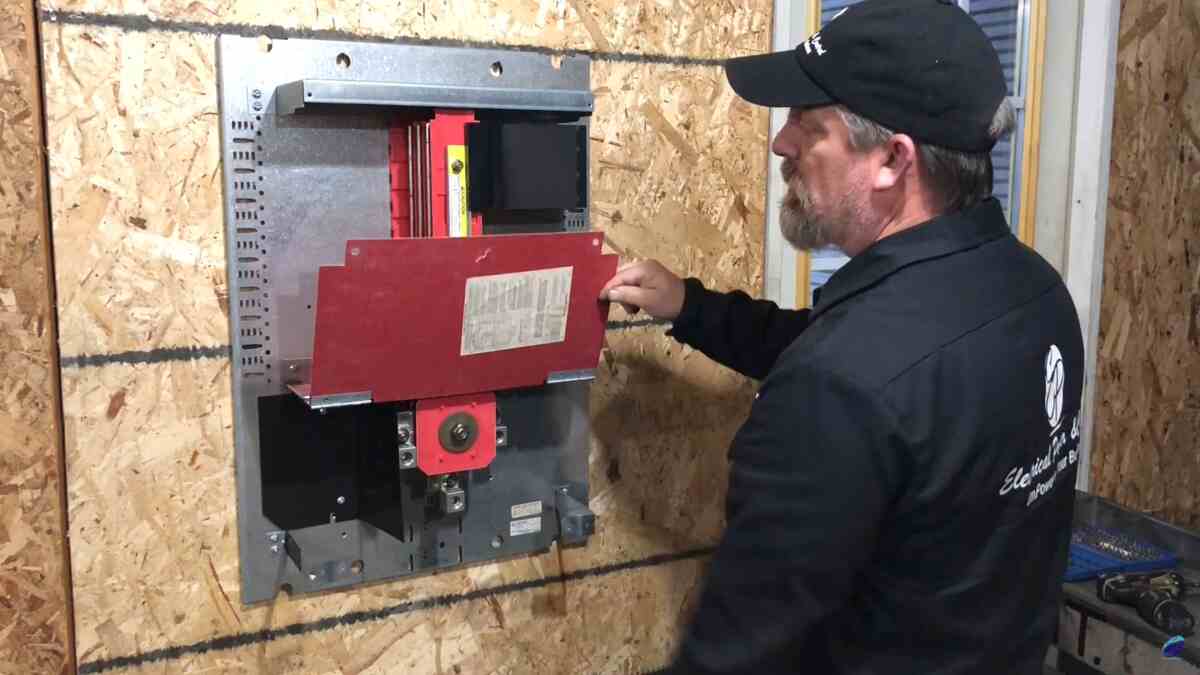
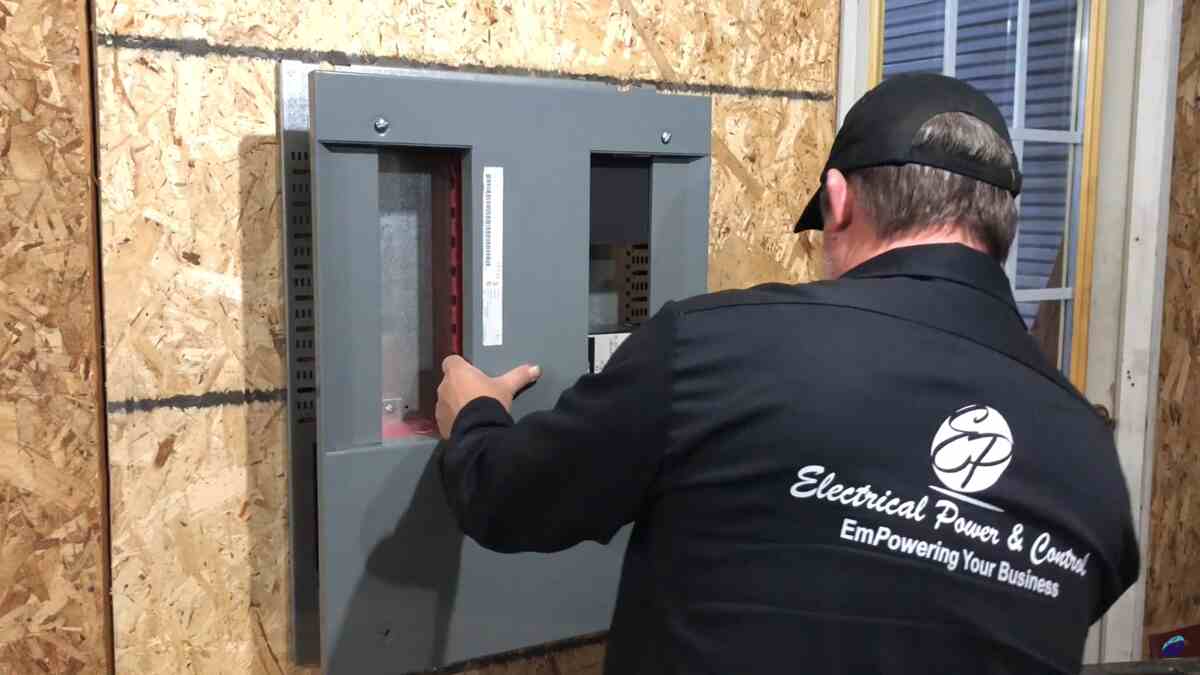
Step 2: Remove the Dead Front Cover
- Unscrew the panel cover.
- Carefully lift and store it to expose the breaker compartment.
Step 3: Loosen the Retainer Screw
- Locate the retainer screw holding the breaker in place.
- Use a screwdriver to loosen (but not completely remove) the screw.
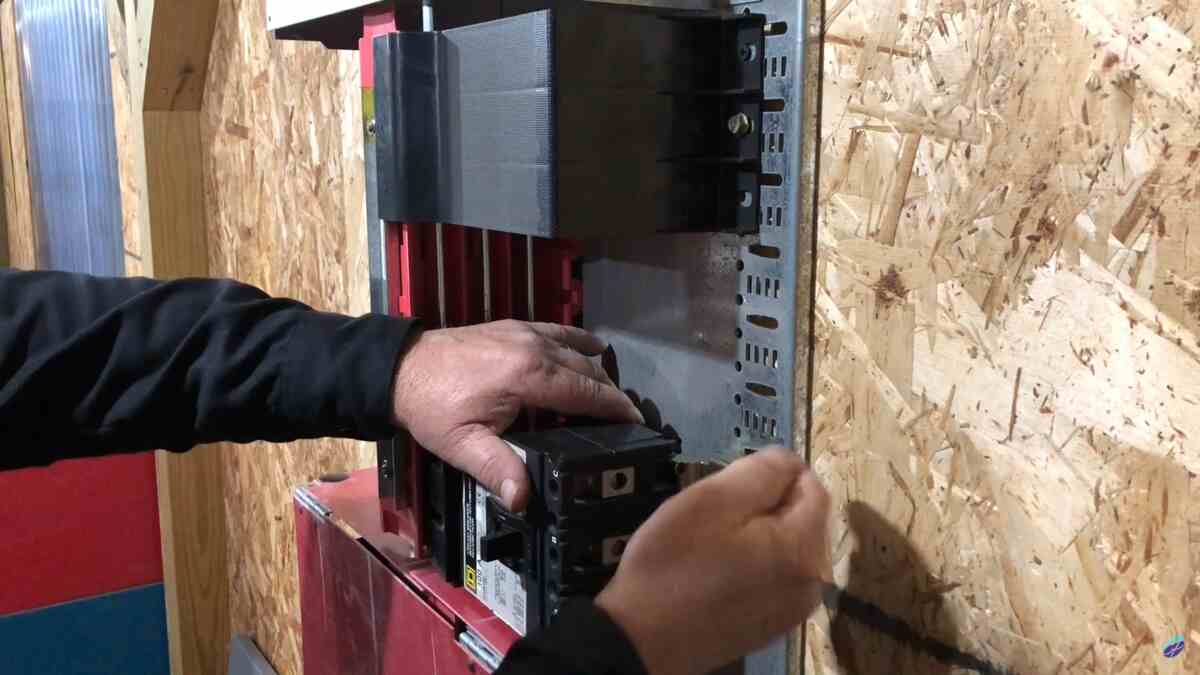
Step 4: Walk the Breaker Out
- Using a screwdriver, gently pry the breaker off the bus bar.
- Disengage the hooks from the panel’s mounting slots.
- Remove the breaker from the panel with steady hands.
Step 5: Prepare the New Breaker
- Make sure the new breaker is OFF.
- Align the hook “foot” with the teardrop slots in the panel.
- Slide it in and apply pressure to seat it flush.
Step 6: Walk the Breaker Onto the Bus Bar
- Use a square slot or screwdriver to gently push the breaker until the copper jaws make full contact with the bus bar.
Step 7: Tighten the Retainer Screw
- Once the breaker is fully seated, tighten the retainer screw.
- Make sure there’s no movement or looseness.
Step 8: Reinstall the Dead Front Cover
- Position the cover above the insulation barriers and over the breakers.
- Secure it using the original screws.
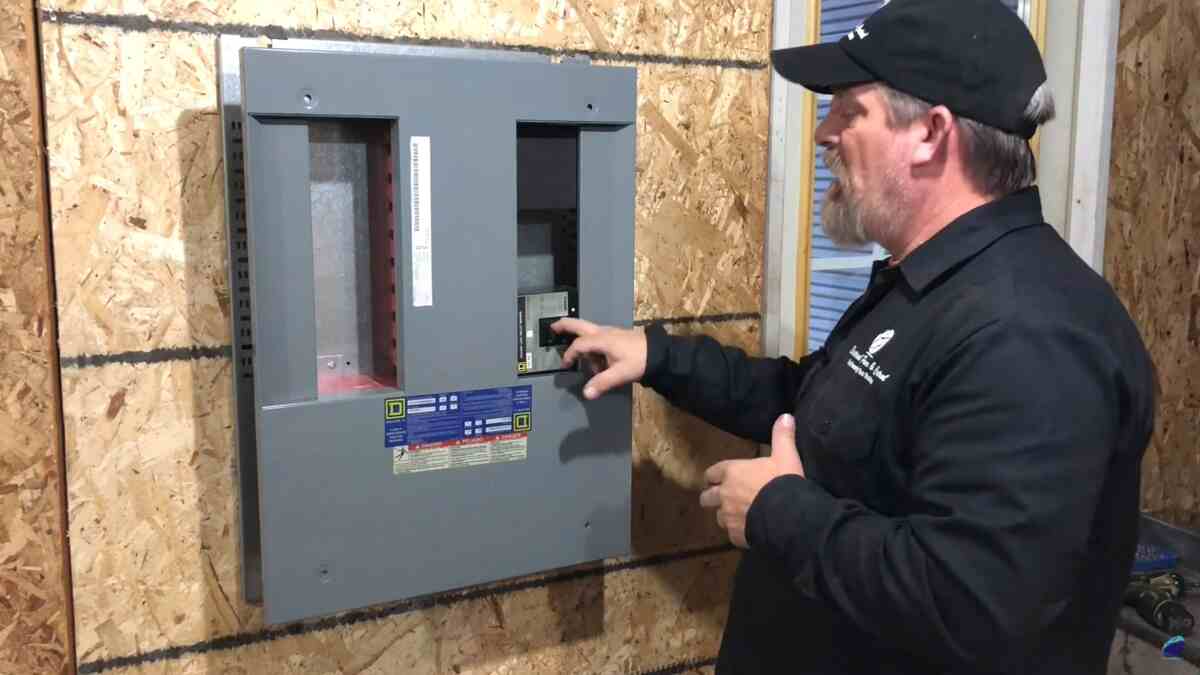
Step 9: Power Up
- Ensure all tools are removed and no debris is inside the panel.
- Turn on the main breaker.
- Turn on your newly installed I-Line breaker.
- Observe for a few minutes—check for any noise, heat, or tripping.
Troubleshooting Tips
- Still tripping? There may be a short downstream—inspect connected circuits.
- Breaker won’t seat properly? Check the foot hooks and alignment with the teardrop slots.
- Wrong model? Contact us for help matching or sourcing the correct breaker.
Remember: The right part + the right method = the right result.
Why This Guide Matters to You
For Contractor Carl, this guide means:
- No guesswork during installs
- Faster turnaround times
- Fewer service callbacks
For Industrial Ingrid, it delivers:
- Preventative maintenance insight
- Improved equipment uptime
- Safety and compliance peace of mind
Understanding how to properly replace an I-Line breaker keeps your system efficient, your team safe, and your reputation strong.
Conclusion
Replacing an I-Line circuit breaker doesn’t have to be complicated or intimidating, especially when you’re equipped with the right information, tools, and safety mindset. This guide walked you through everything from understanding the anatomy of an I-Line breaker to safely removing and replacing one in the field. By following these proven steps, you ensure the longevity of your electrical system, reduce the risk of downtime, and uphold the highest standards of safety and performance.
Whether you’re a contractor aiming for flawless installs or a facility manager focused on preventive maintenance, your ability to handle breaker replacements correctly makes you a more efficient and trusted professional.
And remember—you’re never alone in the process.
At Electrical Power and Control, we’re here to support you with:
- Expert technical guidance
- Fast, reliable sourcing of I-Line components
- Custom solutions tailored to your facility or project
Have a question or need help finding the right breaker? Call us today at (205) 812-5402.
Let’s keep your power flowing—safely, smoothly, and without surprises.